Vanessa's Recipes

Posts tagged ‘Dessert’

Devil’s Food Cupcakes & Buttercream Frosting | Your Lighter Side


Devil’s Food Cupcakes & Buttercream Frosting


Yes, please. Copyright Candice Wong.

The combination of rich, robust chocolate (coffee? Yum!) and the sweet coolness of a buttercream is such perfection, you might have to make sure to share with neighbors or freeze the batch so you don’t eat them all in a sitting. For Birthday parties, school functions, bake sales and other gatherings where a deliciously rich, gluten-free, sugar-free confection is desired, these clock in at only 5.7 net carbohydrates for a treat you can truly enjoy.

Re-blogged from: Devil’s Food Cupcakes & Buttercream Frosting | Your Lighter Side

You want the recipe.  I know you do.  I can see it in your drool. 

Mine too!  LOL

But you have to ask Jamie, over at Your Lighter Side.  Don’t worry, she’ll share, she’s really nice like that!  Smile  So click the link and go!  Devil’s Food Cupcakes & Buttercream Frosting | Your Lighter Side

~Ness

[tweetmeme source=”DarcsFalcon” only_single=”false”]

Low Carb Desserts

Every so often we get that taste for something sweet.  Satisfying that while living a sugar-free lifestyle might seem a bit daunting, but I have a couple of simple, and EASY recipes to make something sweet when you just have to have it.  Smile  Personally, I’m not really into trying to figure out how to use non-flour stuff to bake things.  Just give me easy and familiar and we’ll be just fine.  Winking smile

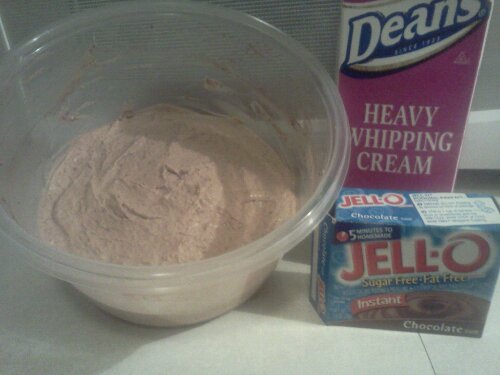
First up, if you’ve got 5 minutes, I can give you Chocolate Mousse!  I kid you not!  I got this one from my husband, actually.  Just take a small box of sugar-free Jello instant pudding and 2 cups of heavy whipping cream.  Use the cream instead of milk, and follow the package instructions.  And make sure it’s the instant pudding!  I don’t know if this would even work with the pudding mix you have to cook, lol.  You can do this by hand with a wire whisk.  I have one of those little Gizmo things that I picked up a few years ago at Walmart.  I don’t know if they still make them, but I’m sure you could find something similar.  Just a simple little tool but great for small jobs like this one.  Smile 

All told there are maybe 8 carbs in the whole thing, depending on what flavor of Sugar-free Jello you use.  It’s a great chocolate fix!  And of course, with all the flavors, you can have lots of variety if chocolate’s not your thing.  I think it’s a great alternative to ice cream.  Smile

image

*********

This one I call Jello-Whip Delight.  I actually got this recipe when I was a kid, from an elderly relative who was on a tight budget but still wanted to have a little something sweet.  She used regular Jello and Cool Whip back then, but today I can use sugar free for both and seriously cut back those carbs.  Still have to be careful though!  In truth, the sugar free Cool Whip is actually higher in carbs per serving than the regular version, but there is no High Fructose Corn Syrup.  You’ll have to decide which you want to trade – carbs or HFCS?  Either way, still use the sugar free Jello.  With regular Cool Whip, you’ll get about 50 carbs for the entire thing, and about 75 with the sugar free one.  If you divide the bowl into 5 servings, that’s 10 and 15 carbs per serving, respectively.  Smaller portions will be even fewer carbs, so you’ll have to decide how much you want to eat to satisfy that sweet tooth.

This is great any time of year, but especially in the warmer months.  You can use any flavor Jello that floats your fancy, too!  Just make according to package directions and chill.  I’ve found about 4 hours works well.  Once it’s set, I pull out my handy-dandy little Gizmo and beat it until it’s almost liquid again.  Once that’s done, I mix in the Cool Whip thoroughly and let it chill again for a little bit, maybe 30-60 minutes.  Once it’s set, you’ll have a pudding-like dessert in almost any fruit flavor under the sun.  Jello is great about having lots of flavors.  Smile 

image


If you try ‘em out, let me know what you think!

Taste the Rainbow Cake

For my daughter’s birthday, by special request, I made a rainbow cake.  It turned out really well.  I followed the directions I found over on this blog:

how to make a rainbow cake!


I didn’t use the diet recipe because my 6 year old isn’t on a diet but that recipe does look super simple.  Smile  I just followed the standard directions on the box mix I used. 

100_0008

Mixing the colors was fun.  Finding enough bowls to mix them in was a pain!  LOL  I didn’t mix the basic cake mix much at all, just a rough mix, since I knew the batter was going to get a longer mixing once I added in the colors.  Then I divided into 6 roughly equal portions.  I ended up with about 1 and 1/3 c. of batter per color.  I used about 24 “dots” of gel for each color as well.  The orange and purple you have to design yourself but I found that about a 3-1 ratio of yellow to red made a good orange, and the same for blue to red made a decent purple.

100_0011

I followed the recipe creator’s instruction to use a greater amount of the bottom colors first, and also to reverse them in the pans.

100_0013

I needed to bake mine a little longer than the box called for (about 5-8 min), probably because I was using 2 boxes of cake mix, like the recipe called for.  My cakes seemed more brown than the creator’s did, but I also used the egg whites and oil in mine so that may account for some of that golden color too.

100_0025

Once it was done though, and we cut into it, the vibrancy of the colors really came through! 

100_0026

The pudding/Cool Whip frosting mix tasted really good but it was just a tad sticky to work with.  I recommend pushing the frosting.  It’s a technique I was taught many years ago.  You put a big glob of frosting on the middle of your cake and then spread it by gently pushing small areas of the glob away from the center rather than adding small globs a little at a time and pulling them toward you.  Don’t try to “smear” the frosting or you’ll tear your cake.

Also, I opted to simply invert my bottom layer when I assembled it, rather than slicing some off to make it level. 

It was so much easier than I thought it would be, the hardest part really was just mixing the colors over and over because that got a little old and repetitious because I did it by hand but otherwise, it was lots of fun, and the “ooh!” factor from my kids was the best part.  Open-mouthed smile

Okay, I “oohed!” too.  Winking smile

Cross-posted at At Grandma’s Table

Cake-Pie with no name

Begin the day before as this needs to chill overnight and you’ll need time to cool the crust also.

You will need:

  • 13×9 glass pan

Layer 1:

  • 1 c. flour
    ½c margarine or butter
    1 c. chopped pecans – or any nuts but walnuts aren’t very good in this recipe, and neither are peanuts.  An almond/pecan mix is pretty good, and my husband thinks hazelnuts might be good too.  

Layer 2:

  • 1 c. sugar
    8 oz. cream cheese
    (half of) 1 lg container of Cool Whip (12 or 16 oz)

Layer 3:

  • 1 lg pkg Jell-o instant chocolate pudding
    1 lg pkg Jell-o instant vanilla pudding
    3 c. milk

Layer 4:

  • remaining half of Cool Whip
    Hershey chocolate bar, plain

To begin:

Layer 1

  • Preheat your over to 350° – this is the only baking you will do for this recipe.
  • If you have a food processor you can use that, or a hand mixer will work great too.  Mix the nuts, butter, and flour to a paste.  It will be lumpy because of the nuts, you’re not looking for nut dust or anything.  Press this mix into the cake pan and bake for 20 min.  Allow to cool completely before adding the other layers.

Layer 2

  • Cream together the cream cheese, sugar, and half of the Cool Whip.  Pour onto the cooled crust and spread evenly.

Layer 3

  • Don’t begin this step until you are ready.  If you make it too far in advance, the pudding will set and be very difficult to spread over the previous layer.
  • Combine the pudding mixes with the milk and mix.  Don’t follow the box directions, just pour the dry mixes into a lg bowl, add the milk and mix together.  Before it sets, pour it over the cream cheese layer, and smooth it out evenly.  Allow to set.  Since it’s instant pudding, this will only take a few minutes.  When it’s chilled, go on to the next step.

Layer 4

  • Spread the remaining half of the Cool Whip over the pudding layer.
  • Chill overnight in the fridge.  Just before serving, you can grate (part of) a plain Hershey bar over the top to make little chocolate curls for decoration, or you can add sprinkles of some type but keep in mind they will probably bleed into the topping after a while.  If that is important to you. 
  • Now, eat and gain weight.  🙂

If you can think of a name for this, let me know!  I was thinking Chocolate Snow Pie, but I’m no good with such things.  🙂

Tag Cloud