Vanessa's Recipes

Archive for the ‘Baking’ Category

Challah Back Girl

I have no idea why a low-carb Gentile girl suddenly feels overwhelmingly compelled to make Challah bread for Shabbat, but there you go. 

And I am beyond proud to say it turned out epic!  Whew!  Woo!

Recipe here: Challah – Averie Cooks

Before 2nd rise
20160603_153746

After 2nd rise, before baking
20160603_175347

After baking
20160603_181450

Before eating
20160603_183020

Ummm, you don’t want to see any pictures after that.  Winking smile

All rights reserved by Nessipes.

cross posted on my daily blog

Pumpkin Cookies


We had a very special event at church this weekend.  One of the couples that attend, had a renewal of their wedding vows.  It was a beautiful ceremony! 

Before the ceremony started, we had an hors d’oeuvres table, and I brought cookies.  I found this recipe on Pillsbury.com and they looked simple enough so I thought I’d give them a shot.  (Full recipe at the bottom of this post, with link to original.)

They turned out delicious!  Whew! 

I doubled the recipe since we were having a crowd, and I also backed off the pumpkin pie spice a little.  Instead of using 4 tablespoons as the doubled-recipe called for, I only used 3.  It seemed to be the right call, as the spice wasn’t overpowering, but still strong enough to give the cookies a good flavor. 

I was a little worried at first since the pumpkin made the dough very wet.  I thought they would spread all over the pan, the batter was so loose. 

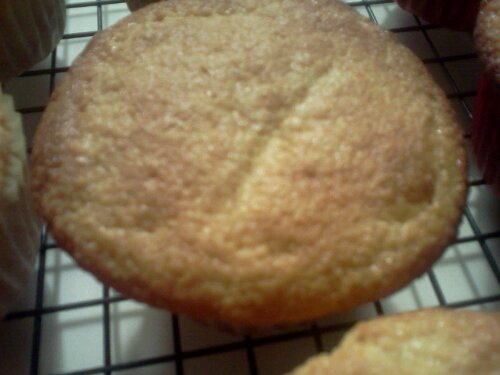
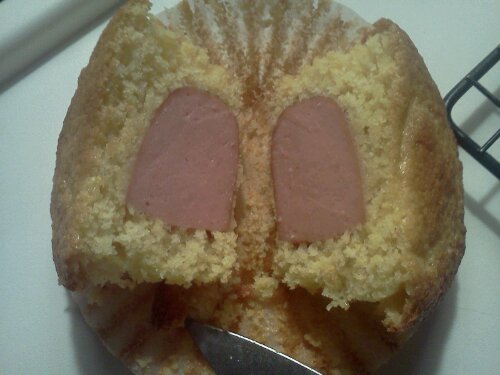
The cookies were very moist, almost like a chewy cake, or brownie consistency.  My husband had a tiny nibble and loved them.  Yay! 

I waited until we got to church to frost them.  I knew I wouldn’t be able to transport them with frosting, as I wouldn’t be able to pile them into a tray.  Since it was a festive day, naturally I had to add sprinkles.  You knew I would.  Smile

Here’s my finished product. 

20141012_175406

If you get a chance to try this recipe, I give it rave reviews. 

All rights reserved by Nessipes.


5-Ingredient Pumpkin Cookies 5-Ingredient Pumpkin Cookies

Why bother with pumpkin bars when you can make super-easy pumpkin cookies instead?

prep time 15 min
total time 1 hr 5 min
ingredients 5 servings 18

5-Ingredient Pumpkin Cookies

Ingredients

1 roll Pillsbury™ refrigerated sugar cookie dough
2 tablespoons pumpkin pie spice
1/2 cup canned pumpkin not pumpkin pie mix
1 package 8 oz cream cheese
1 cup powdered sugar

Steps

1 of 4 Heat oven to 350°F. In large bowl, break cookie dough into small chunks. Add pumpkin pie spice and pumpkin. Beat with electric mixer on medium speed until well blended.

2 of 4 Drop dough by rounded tablespoonfuls about 2 inches apart on 2 ungreased cookie sheets.

3 of 4 Bake 14 to 16 minutes. Cool on pan 5 minutes; remove to cooling rack to cool completely, about 30 minutes.

4 of 4 Meanwhile, unwrap cream cheese. Place in medium microwavable bowl. Microwave uncovered on High 1 to 2 minutes, stirring every 30 seconds, until softened. Stir in powdered sugar until smooth. Spread on cookies.

Making these for Halloween? Transfer icing to a quart-sized resealable food-storage plastic bag, and refrigerate. When ready to ice cookies, cut a tiny piece from a corner of the bag, and squeeze icing out to make jack-o’-lantern faces or crescent shapes for harvest moons.

In a pinch, canned cream cheese frosting can be used instead of the cream cheese and powdered sugar mixture.

via 5-Ingredient Pumpkin Cookies recipe from Pillsbury.com.

Cherry Bombs

We have a new girl in the office where I live.  I wanted to welcome her, so I made cupcakes.  Hey, it’s what I do.  🙂 

Remember that cherry extract I got a few weeks ago?  Yeah, it rocks in the plain white cake mix.  I used 2 teaspoons.  Also, because it’s Autumn and I wanted to play a little – I’ve been in a mood, not sure why – I added some food coloring.  McCormick has these Fall Colors that are really nice.  I used 10 drops of the burgundy in this batch.

They looked okay going in, and the kids said the batter tasted good.  But I still kept my fingers crossed anyway. 

20131111_130109

And they turned out okay!  Whew!

20131111_132214

I added 2 drops of regular yellow food coloring to plain white frosting and mixed it up right in the little tub.  I was going for an ivory look.  I thought that might have more of an Autumn feel than stark white. 

And of course, I had to use the Autumn cupcake liners and sprinkles I picked up recently, too.  🙂

20131111_140909

20131111_141058

20131111_141106

20131111_141148

I let the kids have one, testing purposes you know!  They said they turned out awesome, yay! 

But wouldn’t you know, when I took the cupcakes over to the office to meet the new girl and say hello, it was her day off!  *facepalm* 

Oh well.  The other ladies said they might leave her some, lol. 

All rights reserved by DarcsFalcon

Strawberry Chocolate Chip Cookies. – Sallys Baking Addiction

Strawberry Chocolate Chip Cookies by sallysbakingaddiction.com


Mixed with a little oil, chocolate chips, 2 eggs, baking powder and vanilla, strawberry cake mix is the base of what may be the prettiest and softest cookie I’ve ever baked.

via Strawberry Chocolate Chip Cookies. – Sallys Baking Addiction.

LOOK at those cookies!  They’re PINK!  And chocolate chip!  Oh, I’m in cookie heaven just looking at the pictures.  🙂  I think I’ll make these for the kids one of these days, so I can at least smell them, since I can’t eat any myself. 

Meanwhile, I have a new website to drool over.  Check it out:

Sallys Baking Addiction

Go look, and take a napkin, because you’ll be drooling too.  🙂

All rights reserved by DarcsFalcon

Jiffy Corn Dog Muffins

I found this recipe on Pinterest.  Gosh I love that site!  Anyway, I have a picky Princess who loves the mini corn dogs we get from the frozen section at the grocery store.  Sometimes it’s not easy to get to the grocery store, however.  You’re probably like me, feeling guilty when you don’t have your kid’s favorite snacks on hand.  So after finding this recipe I thought I’d give it a try. 

The verdict is in. 

The Princess would rather I make them now than buy them. 

Score!  Open-mouthed smile

Golden brown and delicious! 

The recipe is just the one from the Jiffy box, except for adding in a tablespoon of honey for each box you use.  I used 2 and got 15 standard sized muffins.  The lady I got the recipe from used 1 and got 20 mini muffins.  Your mileage may vary. 

Also, I used whole milk, not skim.  And, I used 5 hot dogs cut into 3 pieces each.  Plus, as you can see by the line on top, I didn’t cover the hot dogs with batter.  They did cover up automatically while baking though.  Smile

image


image


image


Servings – approx 20 mini muffins   Servings size – 1 mini muffin  

  • 1-8.5 oz. box of Jiffy Corn Muffin Mix
  • 1 egg, slightly beaten
  • 1/3 cup skim milk
  • 1 TBS honey
  • 4 Hot dogs, each cut into 5 pieces 

1. Spray the wells of a mini muffin pan with cooking spray.  Preheat oven to 400 degrees F. 

2.  In a med bowl, combine the mix, egg, honey and skim milk.  Allow to sit for 3 – 4 min.  Stir batter.  

3.  Fill each mini muffin well with about 1/2 TBS batter.  Place a piece of hot dog into each well, pressing in.  

4. Top each hot dog with about a tsp. of batter, covering hot dog.  

5.  Bake in oven for 10 – 15 min.  or until golden brown.  Allow to cool in pan for 5 min. before removing to platter. 


Clipped from My Kitchen Adventures: Jiffy Corn Dog Mini Muffins

Rolled Buttercream Fondant Recipe

This is where I got the recipe: Rolled Buttercream Fondant Recipe – Allrecipes.com

I have to say, it was MUCH easier to make fondant than I thought it would be.  I was pretty intimidated at first, but my son wanted a solar system cake so I had to figure out a way to make it.  Smile

Turns out, even without a stand mixer, mixing it was fairly easy.  It did require a bit of muscle, but honestly, not as much as making bread by hand.

It was a bit on the greasy side though, due to the shortening, so you’ll need lots of soap and water to wash your hands with afterward. 

I did find that the finished product was a bit on the soft side.  I used it for making planets, not for actually frosting the cake, but it would work well in that application.  It would also work well for cut out flat shapes, but it would probably be a bit too soft for more elaborate shapes that need to stand on their own.  But for the home baker, it’s an easy and fun way to decorate.  Smile

I’d also recommend reading through the the reviews of it on the website too – they had some great tips!

By the way, I didn’t have clear vanilla, I just used regular, and it still came out pretty white. It was basically eggshell white, if not a pure white, and I also used gel colors and they worked great.

 
Ingredients
  • 1 cup light corn syrup
  • 1 cup shortening
  • 1/2 teaspoon salt
  • 1 teaspoon clear vanilla extract
  • 2 pounds confectioners’ sugar


Directions
  1. In a large bowl, stir together the shortening and corn syrup. Mix in the salt and vanilla flavoring, then gradually mix in the confectioners’ sugar until it is a stiff dough. If you are using a stand mixer, use the dough hook attachment. Otherwise, knead by hand. If the dough is sticky, knead in more confectioners’ sugar until it is smooth. Store in an airtight container at room temperature or in the refrigerator.
  2. To use, roll out on a clean surface that has been dusted with confectioners’ sugar until it is 1/8 inch thick or thinner if you can. Drape over frosted and chilled cakes and smooth the sides down, or cut into strips to make bows and other decorations.

Taste the Rainbow Cake

For my daughter’s birthday, by special request, I made a rainbow cake.  It turned out really well.  I followed the directions I found over on this blog:

how to make a rainbow cake!


I didn’t use the diet recipe because my 6 year old isn’t on a diet but that recipe does look super simple.  Smile  I just followed the standard directions on the box mix I used. 

100_0008

Mixing the colors was fun.  Finding enough bowls to mix them in was a pain!  LOL  I didn’t mix the basic cake mix much at all, just a rough mix, since I knew the batter was going to get a longer mixing once I added in the colors.  Then I divided into 6 roughly equal portions.  I ended up with about 1 and 1/3 c. of batter per color.  I used about 24 “dots” of gel for each color as well.  The orange and purple you have to design yourself but I found that about a 3-1 ratio of yellow to red made a good orange, and the same for blue to red made a decent purple.

100_0011

I followed the recipe creator’s instruction to use a greater amount of the bottom colors first, and also to reverse them in the pans.

100_0013

I needed to bake mine a little longer than the box called for (about 5-8 min), probably because I was using 2 boxes of cake mix, like the recipe called for.  My cakes seemed more brown than the creator’s did, but I also used the egg whites and oil in mine so that may account for some of that golden color too.

100_0025

Once it was done though, and we cut into it, the vibrancy of the colors really came through! 

100_0026

The pudding/Cool Whip frosting mix tasted really good but it was just a tad sticky to work with.  I recommend pushing the frosting.  It’s a technique I was taught many years ago.  You put a big glob of frosting on the middle of your cake and then spread it by gently pushing small areas of the glob away from the center rather than adding small globs a little at a time and pulling them toward you.  Don’t try to “smear” the frosting or you’ll tear your cake.

Also, I opted to simply invert my bottom layer when I assembled it, rather than slicing some off to make it level. 

It was so much easier than I thought it would be, the hardest part really was just mixing the colors over and over because that got a little old and repetitious because I did it by hand but otherwise, it was lots of fun, and the “ooh!” factor from my kids was the best part.  Open-mouthed smile

Okay, I “oohed!” too.  Winking smile

Cross-posted at At Grandma’s Table

Tag Cloud